This project is a real example of crafty serendipity. I’ve been noodling with this stiffened-fabric idea since June, but with one thing and another and another, haven’t gotten around to posting it.
When I finally went to photograph this tutorial, I realized the season was changing, and I’d need to switch from the summery fabrics I’d been using to something more Fall-appropriate. And that fabric switch totally transformed the project.
Anyway, here’s how it’s done…

To begin, you’ll need a number of things handy:
- A bunch of woven-cotton fabric squares (I’m using 2″ and 1 1/2″ ones here, but – experiment!)
- Some fabric stiffener (I like Stiffy, and there’s also Aleene’s.)
- A work surface (wrap a piece of cardboard tightly with plastic wrap, and tape it to the back.)
Pour some stiffener into a shallow dish. Have some paper towels at the ready – things will get messy!

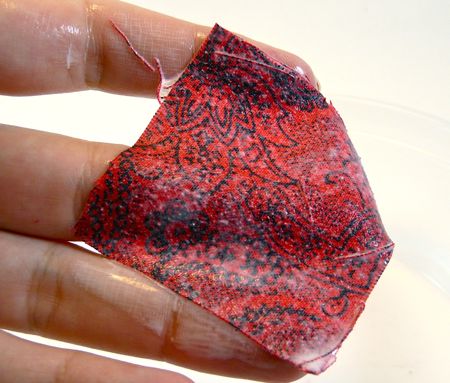
Saturate a square of fabric in the stiffener, and lightly wipe away the excess. There should be a film of stiffener over the surface, but you should be able to see the pattern through that.

Place the square face down on that plastic-wrapped surface. Gently fold the four corners in to meet at the center, as shown. You’ll have plenty of time to adjust them so the resulting shape is nice and square.

Some fabrics will fray a little during this process, and leave little threads sticking out at the corners, Don’t worry about this right now – we’ll deal with it later.

Stiffer fabrics have a tendency to pop up in the center. If this is happening, just dip your finger in the stiffener and place a dot of it over those four corners, as shown. It’ll vanish when it dries.

I like to let the pieces sit a few minutes, and then gently plump up the squares by pinching them on the sides a bit. I think they’re prettier if they aren’t totally flat.
Make as many pieces as you need, and leave the whole thing to dry completely. This will probably take overnight.

When it’s all dry, you can gently peel the squares off the plastic wrap. Sometimes it helps to slide a thumbnail under the edge to get it started.

…And now, we’ll trim off those bits of frayed thread! Now that the fabric is stiffened, you won’t see any more fraying.

If you find a little ridge of dried stiffener at the edges of your square, just scrape it away with your thumbnail.

So now you have all these design elements to mix and match. You can combine different sizes, fabrics, and configurations to make all kinds of pretty things.
I’m arranging these fabric tiles with the four folded-in corners facing up, by the way.

…And then we’ll add some buttons, which makes things even more interesting.

So, to assemble these tiles into jewelry, we’ll sew them. The stiffened fabric is still stitch-able, but I’d recommend keeping a thimble and a pair of needle-nose pliers handy – they help push and pull your needle if it gets stuck.
First, we’ll sew a button to this tile. Let’s hide the knot in our thread under the button. Just pass the needle down through the center of the tile. These tiles are quite stiff now, but still, handle them carefully. Try not to bend or crush them.
If you wiggle your needle a bit as you press it into the stiff fabric, it’ll go through more easily.

From here, sew on your button as you normally would. Once you’ve made the first set of needle holes, you can keep using them for the rest of the stitches.
(Incidentally, I love using a contrasting thread with the button. I’m working with doubled thread here, but that can be fiddly. Single thread works great, too.)

To finish the thread, pass it under your stitches on the back of the tile, and then knot it.

Here are a couple variations on this idea. When I want to stack up several tiles into one piece as you see here, I’ll follow the same steps to hide the knot under my button, but then I’ll also take a couple stitches through all the tiles. That helps hold them in place while I sew on the button.
And also, I prefer sew-through buttons for this project overall, because they’ll stay flatter against the fabric. However, I found this shank button in my stash – it has a really shallow shank, so it worked well.


I like using simple methods to convert these pieces into jewelry. You can easily sew on a jump ring, as seen here, and then add it to a chain or neckwire.

Or, you can pass a needle through the top edge of back tile, as shown here. This allows you to suspend the piece from waxed thread, narrow ribbon, or (in this case) pearl cotton.

You can totally use these tiles in clusters. In fact, you can make a whole lot of other things besides jewelry! Consider these ideas:
- They’d make a cool garland.
- You could make some interesting holiday ornaments.
- They’d make pretty package toppers or gift tags.
- They’d also be cool card embellishments.
- They’d be an interesting dimensional embellishment on a curtain
- Ditto for a lampshade.
What other ideas do you come up with?